Spring Calving - An Ounce of Prevention...
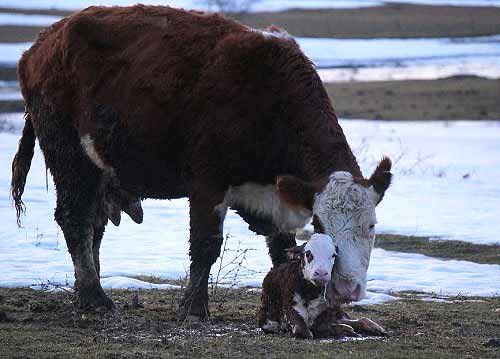
Image Credit: Rachel Kramer
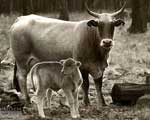
With calving season quickly approaching for many farmers in the Northern Hemisphere, it is a good time to look at some of the most powerful preventative measures for making your spring calving season more successful.
Some of these tips are things you can do either just before calving season starts or during the calving season itself in order to make both your own and your cows' lives just a little easier. And a few of the tips are changes you can make to your cow-calf program up to 9 months before calving season begins, so this is the right time to begin planning for those changes.
The tips in this article are specifically tailored to farmers who have not yet made the switch to summer calving. You can learn all about how to set up a summer calving program on pasture here.
1. Late-Night Cattle Feeding
While calves can be born at almost any time of day, the largest number of calves will be born while the cattle herd is bedded down and resting, not during feeding time or immediately after feeding when the herd first settles down to chew their cud. This means you can manipulate the time of day when the majority of your calves will be born.
Switch your cattle feeding time to late at night just before you go to bed. During calving season my dad would always fire up the feed wagon long after our own dinnertime, and then streak to bed for a few quiet hours of sleep.
Feeding the cows late at night instead of during the day will cause more of the calves to be born during the daylight hours when temperatures are warmer, when you don't require a flashlight to do your herd checks, and when vets don't need to be shaken out of bed if there's a problem you can't solve on your own. It also means you just might be able to get a bit of sleep between herd checks at night.
2. Body Conditions BEFORE Calving Begins
Make sure your cow's body conditions are between 5 and 7 at calving, preferably 7, BEFORE calving season begins. This helps not only with colostrum production, but this is also the KEY to ensuring high fertility rates in the following breeding season.
3. Use a Scours Vaccine on the Cows BEFORE Calving
Scours is one of the leading fatal calf diseases in most spring calving herds. Use a scours vaccine, usually administered up to 16 weeks before calving, with a booster shot a few weeks before calving. Timing varies by product and whether it was used in previous years, so talk to your vet! An ounce of vaccine... need I say more?
4. Pine Trees and Pregnant Cattle Don't Mix
When pregnant cows and heifers eat pine needles, they will abort their calves. While cattle tend to leave pine trees alone during the grazing season since they have plenty of grass to keep their attention, during the winter bored cows will nibble at anything green that catches their attention while they wait for the next pass of the feed truck. So don't keep pregnant cows in fields or pens containing pine trees. And if a pine tree falls over, get it out of the pen ASAP before the cows strip the branches of needles!
5. Calving Difficulties = Automatic CULL
Any cow or heifer that has ANY difficulty calving (even a very easy assisted calving) - write down her number and CULL her (don't rebreed her) and make sure that her calves are equally excluded from replacement heifer or replacement bull herds. No exceptions!
You don't need to cull her immediately - she can still raise her calf first - but don't rebreed her and let her calve again. It's the only way to enforce easy-calving genetics in your herd!
6. Breed Heifers to an Easy-Calving, Small-Framed Breed
First calf heifers are the most vulnerable to calving difficulties because of their smaller size. Many commercial ranchers will therefore breed their replacement heifers with a smaller-framed lower-birthweight easy-calving breed.
On my parents' ranch we always used purebred Angus bulls on the replacement heifers (it was a commercial Simmental-Hereford-Angus mixed breed commercial herd). Many Holstein dairy farmers will use Highland Cattle bulls for the same purpose (though it remains somewhat of a mystery exactly how the little Highland bulls manage the task with tall Holsteins without the help of a footstool). Some producers even use Dexter bulls for their heifer breeding program.
7. Get a dedicated Calf Puller
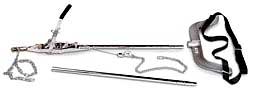
Get a proper calf puller the one shown in the picture below, and learn how to use it.
(Disclosure: I get commissions for purchases made using Amazon links in my post.)
 |
View Calf Pullers on Amazon.com#CommissionsEarned. |
Get your vet to recommend their favorite calf puller, and get them to give you a lesson. You can exert a tremendous amount of force and do irreparable damage to your cows if you use it incorrectly, but it is an absolutely VITAL tool in the spring calving toolbox.
Don't cut corners and try to use a come-along to pull calves if hand-pulling doesn't work. The angle of pull using a come-along is wrong so you dramatically increase the chances of killing or severely injuring both cow and calf while using a come-along instead of a proper calf puller.
8. Build a Calving Box
Have a warm dry place ready in the barn for sick or chilled calves. Consider building a dedicated "calving box" for severely chilled or severely ill calves. A calving box is simply a small insulated room with a heat lamp and thick straw for warming up calves.
How to build a calving box: think of a calving box as an over-sized doghouse, built with plywood and insulated walls. Hang a heat lamp from the ceiling of the box as the heat source, and put thick straw on the floor. The calving box should have a door to keep the heat in, but make sure it's not airtight - it's a small space that needs oxygen to breathe! Also, put a plexi-glass window in the calving box door so you can check on the calf without having to crawl inside every time.
Make sure it is large enough for at least 2-3 calves plus room for you to crawl inside to administer bottled milk, colostrum, or a stomach tube. It should have enough headroom so you can squat comfortably inside without burning yourself on the heat lamp every time you crawl inside.
Most farmers like to keep it in the barn so the cow can be kept nearby to make it convenient to take the calf to the cow for milk, or so the cow can easily be milked if the calf is so weak that you need to feed colostrum or milk by bottle or stomach tube.
9. Split Heifers and Second Calf Heifers from the Main Herd
Heifers and second calf heifers have more calving difficulties than mature cows. And they are far more nutritionally vulnerable. In a spring calving program it is therefore good practice to keep heifers and second calf heifers separate from the main cow herd even in the months before calving starts so they don't need to compete with the mature cows for access to the feed bunk and so they can get additional feed supplements or a better quality feed ration so ensure their bodies are in top condition before calving begins.
And once calving begins, they should continue to be kept separate at least until they calf so they can be monitored more closely for calving difficulties. Ideally, their calving pen should be the absolute closest to the barn since they are the age-group that is most likely to need assistance and the most likely to be nervous and flighty if you have to try to get them into the barn to help pull a calf.
10. Calving Pens should be Directly Adjacent to the Barn
Calving pens should be directly adjacent to the barn, with easy gate layouts and simple access so it is easy to intervene if necessary. Nothing is more frustrating than losing a calf simply because you can't get a flighty cow into the barn quick enough.
11. Split Calved Cows from Uncalved Cows
Remove cows that have calved from the un-calved herd. There are many reasons for this:
- It makes it much easier to monitor cows and spot new calves in the un-calved cow herd.
- It makes tagging and calf processing easier because the new calves are easy to find. Tag and process while transferring new cow-calf pairs to the post-calving pen.
- It allows you to feed different feed rations to address changing nutritional needs after calving.
- It prevents unnecessary calf stealing - cows calving in feed pens are prone to stealing each other's calves if they are nearing calving and bedded down in shared bedding areas. (This is generally not an issue when calving during the summer on growing pasture).
Some people with larger cattle herds even go the extra step of creating a dedicated calving pen just for cows that are nearing calving, which is constantly being refilled from the main herd as additional cows start showing signs of approaching their due date.
12. Keep Newborn Cow-Calf Pairs Separate for 1-3 days
After calving, move the new cow-calf pair into a separate "newborn calf pen" with other new cow-calf pairs. They should remain here for 1-3 days, close to the barn, to allow for extra monitoring and health checks, and to provide a distraction-free environment during the crucial pair bonding stage between cow and calf.
Once the calf looks strong and healthy, the cow-calf pair can be moved on to the next pen...(see the next step below)...
13. Split Calves by Age Group
Separate cow-calf pairs into different herds based on calf age from the time they are born until the cattle are released onto pasture at the beginning of the growing season. In other words, create new groups of cow-calf pairs every two to three weeks (when we were still spring calving, we usually split the herd into two groups, with calves born in the first 21 days of the 42-day calving season in the first group, and calves born in the second 21 days in the second group).
Splitting cow-calf pairs into calf-age-groups is a way of quarantining disease transmission. Calf vulnerability to post-calving diseases like scours, pneumonia, or coccidiosis tends to rise or fall depending on calf age. As the older calves become susceptible to scours a few weeks after calving, calves in the younger group are not exposed to the disease. Likewise, once the calves get stronger, the older groups won't be re-exposed to the disease through contact with younger calves that are still going through their most vulnerable stage.
With a bit of luck, you might even manage to restrict outbreaks to only one group if you get a bad disease outbreak.
14. Quarantine, Quarantine, Quarantine
Have a dedicated sick pen for sick calves so you can remove sick calves (along with their mothers) from the rest of the herd as soon as possible. Quarantine is the best way to prevent transmission to other calves. It also makes it easier to find and treat calves for ongoing treatment.
15. Avoid Contaminated Ground
If you've had scours or coccidiosis on your farm in previous years, if possible try to avoid using those pens/fields during wet months during the first few months of the calves lives. The bacteria responsible for these malicious diseases can live in the soil for years, waiting for a new host. The wet muddy weather during spring calving are the perfect conditions for them to spring back to life.
16. Cattle Bedding Piles = Less Calves Born in a Snowbank
Calving cows need bedding to reduce the chance of calves being born in a snowbank or mud puddle (some inevitably still will, but every bit helps). It also helps if the calving area is on well drained soil, free of puddles (location, location, location!).
17. Cattle Bedding Piles = Cleaner Udders
Cow-calf pairs should have clean bedding (fresh straw or sawdust) every couple of days to keep udders clean - dirty udders are a leading cause of disease transmission in a spring calving herd.
18. Build Calf Sheds
Calf sheds are a popular strategy for providing additional warm bedding sites for the calves out of the wind and rain. They should, however, have low boards blocking the entry so that only calves, but not cows, can step inside. The straw inside these calf sheds should be changed regularly (and/or manure removed) so that calves don't lay in manure (oral-fecal transmission is the number one cause of disease transmission among young calves). This is especially critical if you have any sick calves in the herd. During severe disease outbreaks these calf sheds can become death traps if the contaminated manure is not removed and the straw refreshed several times per day.
19. Get the Cattle Feed out of the Muck
As mentioned earlier, oral-fecal transmission is the primary way that diseases are spread among your calves. Feed areas that are reused will inevitably have cows and calves poop and bed down in them, then fresh feed is poured on top - and presto, calves nosing about the feed area will be exposed. If ground feeding, use a fresh location on clean fresh ground with each new feeding.
Ground feeding in clean sites can still be a problem if disease bacteria are in the soil from scours or coccidiosis or other disease outbreaks from previous years. You may want to look at feeding in feed bunks or feeders that get the feed up off the ground.
Feed bunks and hay feeders can be a problem source as well though. They tend to become surrounded by mud and manure, which leads to dirty udders which the calves suck, and presto, fresh disease pressure in the calf herd. Furthermore, feed bunks and hay feeders tend to either be too tall for calves to reach or leave little room for calves, so they are left to nibble at feed that falls down out of the feeders and into the muck.
If using mobile feeders, move them often to fresh ground.
If using permanent feed bunks, make sure they are located on well-drained high ground and regularly scrape away manure build up.
Many feed bunks are built on concrete pads, but the area behind the cow where the pad ends is often a massive problem because of manure build up, plus the warm manure thaws the ground where the concrete ends. This leaves calves wading through chin deep mud and cows dragging udders through the muck in order to clamber up onto the concrete pad.
Ideally the concrete pads should be double the length of your cows (most are typically only built just long enough for the back feet of the cow to stand on the pad). A double-wide pad helps to contain all the manure that is produced during feeding so it can be regularly scraped away with a tractor. This in turn helps reduce the ground thawing at the end of the concrete pad. The end of the concrete pad where the cows step off into the paddock should be well drained and have well-packed coarse gravel to help it stand up to the rigors of the feed season.
20. Buy some Ice Cleats
Buy a pair of ice cleats that fit over your winter/rubber boots. Or get a pair of caulk logger's boots (with the spikes in the boot sole). They will be your best friend next time you try to bring a cow into the barn on icy ground, or worse, try to outrun an overprotective cow on icy ground.
21. Take A Shield To Work
Overprotective cows can be a serious danger during spring calving when you jump on their calves to tag or process them after calving. In reality, you can't really blame the cow for doing her job. Calves born on open range or on summer pasture need that kind of aggressive protectiveness, but that becomes a little hard to remember when you're the one with a target painted on your forehead.
A simple trick to make your life just a little safer: build yourself a plywood shield (i.e. 2'6" x 4' x 1/2") with a couple of handles bolted on the back. Take it with you when tagging and processing calves in the paddock. It adds to your visual bulk, it's less threatening than when a cow can see your predatory eyes, and if things turn ugly it provides a huge degree of extra protection if there's a shield separating you from a cow's head, regardless of whether or not she's got horns.
I learned this trick while working with musk oxen at the Large Animal Research Station in Fairbanks, Alaska, but found it just as useful working with horned cattle like Highland Cattle as well as regular de-horned or polled cattle like those in my parents' commercial cattle herd.
22. Switch to SUMMER CALVING
I've definitely saved my favorite strategy for last - switch to summer calving!
While successfully navigating a spring (or winter) calving season depends on all these complicated and expensive management techniques listed above, the vast majority of calving-related problems simply don't exist when calving on pasture during the growing season.
Death losses, calving difficulties, complex herd management, tagging, processing, complicated cattle nutrition strategies, and calf diseases all simply melt away once you successfully switch your herd over to calving during the growing season. Even the number of cows requiring assistance during calving dramatically goes down when you switch to calving on pasture in the summer.
Calf death losses in most traditional spring calving programs (due to calving problems, still births, and subsequent calf diseases) tend to range between 7-15%, even if you are working your tail off, checking cows every 2 hours, 24 hours/day, throughout the calving season, and doing 2x daily herd checks through your calves to spot and treat for calf diseases.
Once we switched our herd to summer calving, calf death losses (calving + post-calving diseases) dropped to less than 1.5% (calving out a herd of up to 400 cow/calf pairs). We stopped tagging and processing calves at birth. We stopped checking at night. We reduced herd checks to once per day to coincide with the daily grazing rotation. Post-calving diseases all but disappeared. Scours, pneumonia, and coccidiosis became a distant memory. And the barn and the calving box were left to collect dust next to the rusting calf puller.
Switching to summer calving takes considerable pre-planning and requires a rethink of your cattle marketing program, but the payback is considerable and the quality of both your and your cows' lives will be dramatically improved.
To learn more about making the switch so summer calving, check out these articles:
 |
The Benefits of Calving on Pasture - Calving during the growing season is one of the most powerful tools to become a low-cost cow-calf producer. This article explains just why calving on pasture during the growing season is so much better than calving at any other time of year. |
|
The Ideal Calving Date for Raising Cattle - This article will help you choose the precise calving date that will have the most positive impact on your grazing program. | |
|
Calving on Pasture - Calving during the growing season means calving on pasture instead of in a winter feed pen. That changes everything! This article explains how to manage your calving program on pasture in the midst of a daily pasture rotation. |
More Spring Calving Tips:
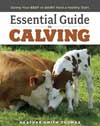
For more tips on how to survive a spring calving season, check out Healther Smith Thomas' book: The Essential Guide to Calving: Giving Your Beef or Dairy Herd a Healthy Start.
While it does not cover the specifics of how to set up your summer calving program on pasture (you can learn more about that in my Calving on Pasture article), it provides invaluable tips on a wide range of calving issues, including instructions on how to recognize calving cows, guidelines for when to intervene and how to recognize the signs of a cow that needs assistance during calving, instructions for how to assist a cow during delivery, and advice for how to deal with a wide range of post-calving diseases that can affect newborn calves.
Share your favorite calving season tips and strategies!
What calving strategies do you use to make your spring calving season easier? And how has your calving season changed if you have already made the switch to calving on pasture? Share your experiences in the Comments section below.
...
Thanks for taking the time to read my article. I hope you've enjoyed it. If you'd like to be notified when I release future cattle farming articles, sign up for my email notifications or follow me on Facebook or Twitter.

